Last Updated on August 3, 2023 By Emma W. Thomas
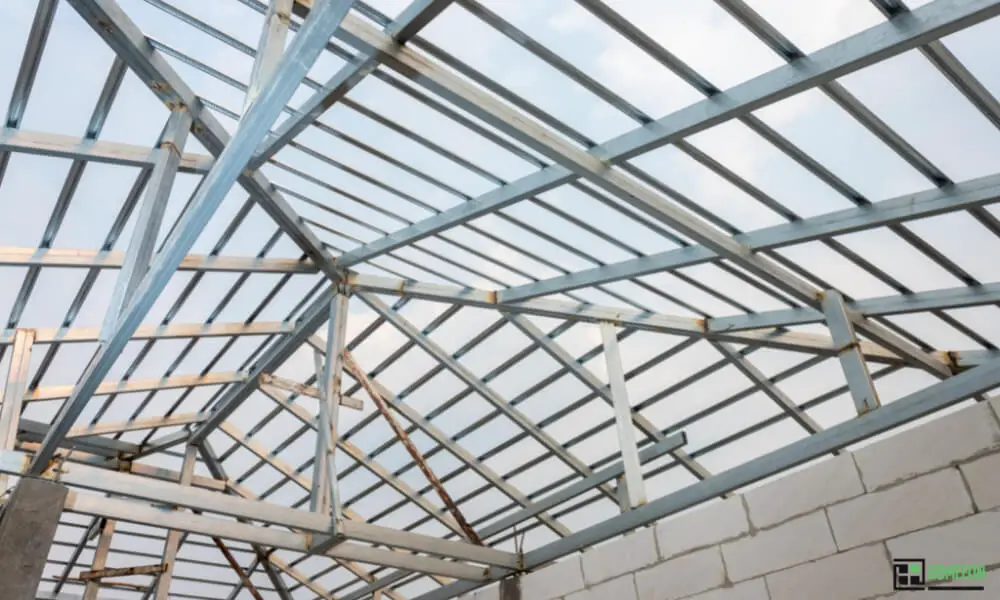
A purlin is a horizontal structural member in a roof that supports the roof covering and transfers the load to the primary roof framing. It provides additional support and stability to the roof structure.
Why Do You Require A Purlin In A Roof?
Purlins are essential in roof construction for several reasons:
- Structural Support: Purlins provide horizontal support to the roof rafters, helping distribute the weight of the roof covering and any additional loads, such as snow, wind, or equipment on the roof.
- Preventing Sagging: Without purlins, the roof rafters may sag under the weight of the roof covering, leading to structural issues and a compromised roof system.
- Preventing Spreading: Purlins help prevent the roof rafters from spreading apart, maintaining the correct spacing and stability of the roof structure.
- Longer Spans: Purlins enable longer rafter spans, allowing for wider buildings or more open interior spaces without the need for additional support.
- Attachment Surface: Purlins serve as a stable base for attaching the roof covering materials, such as metal sheets, tiles, or roofing shingles.
- Even Load Distribution: By distributing the load evenly across the rafters, purlins reduce the risk of localized stress points and potential structural failure.
Pros and Cons of Purlin In A Roof
| Pros of Purlin in a Roof | Cons of Purlin in a Roof |
|---|---|
| Provides structural support to the roof | Increased construction cost |
| Increases the load-bearing capacity of the roof | Requires additional installation time |
| Allows for flexible roof design | Creates potential thermal bridging |
| Offers additional space for insulation | Requires careful planning and design |
| Provides a sturdy base for attaching roof materials | Limited span lengths may require additional purlins |
| Distributes loads evenly across the roof structure | Can restrict ceiling height in certain areas |
| Reduces the risk of sagging or deflection | Increases risks of potential thermal bridging |
| Helps prevent roof damage from snow or wind loads | May require additional maintenance and upkeep |
| Offers potential for increased energy efficiency | Limited design options for traditional or ornamental roofs |
| Can be used to reinforce existing roof structures | May not be suitable for all types of roofing materials |
How Many Types Of Purlins Exist?
These are the two main types of purlins:
Z Purlins
Z purlins are used to give a building its desired shape and roof structure. Their inclination is less than 90 degrees, making them suitable for roofs that need to be curved for beauty. You can overlap them during installation to construct a building that lasts longer.
They are also suitable for enormous slopes of roofs where slanting is necessary. Besides their application on modern buildings, you can position them between roofing sheets to provide additional support due to their robust nature.
C Purlins
You can distinguish them from Z purlins because of their C shape. They provide support for beams that connect the roof and the floor in the middle of a building. In addition, to support, you can use them as joists. They can span different lengths of the roof for more than 20 feet. No drilling is required since they are well-fitted to acquire precise measurements.
Which Are The Best Materials For Roof Purlin?
The choice of materials for roof purlins depends on various factors, including the type of building, budget, climate, and local building codes. Some common materials used for roof purlins include:
- Wood: Treated lumber like pressure-treated pine or cedar is a traditional and cost-effective option. It is relatively easy to work with and provides adequate support for many residential and light commercial roofs.
- Steel: Steel purlins offer excellent strength-to-weight ratio and are commonly used in commercial and industrial buildings. They are durable, resistant to pests and rot, and suitable for large spans.
- Aluminum: Aluminum purlins are lightweight, corrosion-resistant, and ideal for areas with high humidity or coastal regions.
- Engineered Wood: Products like laminated veneer lumber (LVL) or glulam are engineered wood materials designed for specific load-bearing purposes and offer enhanced strength and stability.
- Composite Materials: Composite purlins, made of a combination of materials like wood and plastic or fiberglass, provide a balance of strength and durability.
Red Oxide VS. Galvanized Purlins For Roofing
Comparison of Red Oxide vs. Galvanized Purlins for Roofing
| Property | Red Oxide Purlins | Galvanized Purlins |
|---|---|---|
| Material | Mild Steel | Mild Steel |
| Rust Resistance | Moderate | Excellent |
| Durability | Average | High |
| Maintenance | Regular painting required | Low maintenance |
| Weight | Relatively heavier | Relatively lighter |
| Cost | Affordable | Moderately expensive |
| Installation | Requires skilled labor | Requires skilled labor |
| Aesthetics | Rustic appearance | Sleek and modern appearance |
| Environmental Impact | Not eco-friendly | More eco-friendly |
| Corrosion Protection | Requires additional coating | Protected by zinc coating |
Cost Of Roofing Purlins
The amount you decide to spend on purlins will be determined by the thickness and size of the purlins. On average, the cost ranges from $2 to $5 per linear foot on your roof. It applies to both galvanized and red oxides for the 14 gauge types. However, prices may be lower or high due to importing fee charged for delivering the material right at your doorstep. The price range also covers sizes ranging from 4″ x 2″ to 12″ x 2.5″.
Metal Purlins For Roofing
Applying purlins for roofing will be a good option after selecting the right purlins. Your roof will enable you to choose from 12-gauge, 14-gauge, and 16-gauge purlins. Metal purlins work well when combined with decks and installation accessories. Consult your contractor or engineer to get the right purlins for the best results.
How To Arrange Purlins When Roofing?
By tradition, purlins are arranged depending on the direction of the roofing slope. You should set and space purlins evenly to ensure they support the trusses. Avoid positioning purlins against each other as this will cause bending that distorts the shape of the roof. Instead, place them at the trusses’ nodes to obtain an even arrangement while maintaining a straight roof.
Both Z and C purlins are arranged vertically on roofs to facilitate easy installation and fabrication. You can also position them in butted and sleeve connections, but this will resonate with the nature of your roof’s slope. The arrangement may also differ with run systems employed. Run systems are roofing installation methods and greatly determine how purlins are installed on a roof.
How To Support Roof Purlins?
Purlins provide support for roofs but also need to work efficiently. You should support purlins using rafters to make their stud and avoid curves. Install purlins on top of your roof’s rafters along with a felt underlayment for maximum support. Roof purlins are also complemented by struts and placed 8 feet away from the 2 x 4 posts and 6 feet towards 2 x 6 struts.
Longer distances require extra support by adding more posts, which can be costly when metal studs are used. The standard interval is 5 feet, but the best way to support purlins for roofing is to position them at short intervals to support the heavy loads. Supported purlins will strengthen your roof regardless of its pitching.
Flat, conventional, low-pitched, and high-pitched roofs require you to support the purlins while setting up to ensure a structurally-sound building.
Selecting The Correct Purlins
The run system determines the selection of a purlin. Run systems are the installation methods used when fixing your roof. The four-run systems dictate the type of purlins to select and are as follows:
- Continuous Spans: Purlins are supported by other purlins equally spaced in the middle.
- Double Spans: 2 purlins are supported at the center and the ends.
- Double Lapped: 2 Purlins are arranged to overlap for additional support.
- Single Span: A single purlin spans over the whole structure
Purlins are placed 16 inches from each other or less. This standard measurement should give you the approximate number of purlins you need for your project. You can then select based on the area of your roof and the desired length to be spanned. For instance, roofing a small section will require a 4-inch purlin as it can span up to 12 feet on the roof.
For medium-sized roofs, you will either need 6-inch or 8-inch purlins that span for 18 inches and 25 inches, respectively. A building with a more extensive roof and extended overhangs will require a 10-inch purlin to stretch for 30 feet on the roof. Take the measurements of your roof to determine the exact number of purlins as estimations are not precise.
How Far Should Purlins Be Positioned On Sloping Roofs?
The distance between purlins on a roof is different according to the nature of the roof. For a sloping roof, you will position them at specific intervals based on the spacing of trusses, types of trusses, slopes of trusses, and the kind of roof coverings you use. For example, you will require a safe distance of 1.5m to 1.75m when using corrugated sheets.
Lightweight roofing materials have a joint interval positioning of 4 inches, while heavy roofing materials have extended purlin intervals of 4 feet or more. On the other hand, many residential and commercial buildings have roof purlins spaced 1 to 2 feet apart.
How Do You Install Metal Purlins On A Roof?
Step 1: Get The Measurements
Ran a tape measure from one side of the rafter to another on the roof to get the number of purlins needed. Also, measure the height of the roof and note down the measurements. Repeat the procedures to get the width of the roof.
Step 2: Mark The Installation Positions And Begin
Draw a horizontal line with precise measurements that allows roof purlins to fit. The safe distance between one purlin to the other is about 1.5m to 1.75m. Take a purlin and install it, beginning with its corner. Bolt it with a 16d nail on the vertical rafter that supports the roof. Insert two more inches in the 16-inch spaces on the rafters since they are automatically positioned at intervals.
Step 3: Proceed With The Installation
Add another purlin horizontally, adjacent to the first purlin, and add more purlins downwards. Make sure that the roof is balanced with the positioned purlins. For extra purlins, cut using tin snips whenever the need arises.
Step 4: Finishing And Inspection
Add another column of purlins while cutting unnecessary protrusions down the horizontal line. Check once again to confirm that all purlins are fit to the rafters and that no nails are pointing up.
Note that you are not supposed to weld any part of the roof that contains purlins. Welding produces a lot of heat which affects purlins from functioning correctly and should be avoided. Welding removes the coating on the purlins, which considerably reduces your roof’s durability and lifespan.
Online installation guides are also available, but it is good to confirm with your manufacturers. Nevertheless, this installation guide is general and applies to both Z and C roof purlins.
Final Thought
In conclusion, purlins are essential in roofing. Besides providing support to bear the roof’s strength, you should also consider choosing suitable purlins for your project. When in doubt, the best way is to consult an expert construction engineer to achieve the best roofing that caters to all your needs.
References:
https://www.colourcladprofiles.com/blogs/news/what-are-roof-purlins
https://chartered-surveyor-london.co.uk/what-is-purlin-roof-construction/
Emma is a graduate of Domestic Science or Family and Consumer Sciences (Home Economics) from the University of Wisconsin. She has 7 years of experience Working with the strategic section of BestBuy and now writing full-time for Homeeon.
From Managing the Home, Interiors, Cleaning, and Exteriors to Gardening and everything about Making A Home Liveable – is her passion and this Homeeon is the result of this.
Emma loves decorating her home with the best stuff found online. She cares about quality over anything and writes reviews about them here in Homeeon. Get in touch with her over Pinterest.
Keep reading her blogs.