Last Updated on July 24, 2023 By Emma W. Thomas
To remove wall tiles without damaging plasterboard, follow these steps:
- Wear safety gear, including goggles and gloves
- Gently pry off tiles using a putty knife or chisel
- Apply heat to loosen the adhesive if needed
- Work slowly and carefully to prevent cracks or damage
- Repair any minor dents or holes in the plasterboard afterward
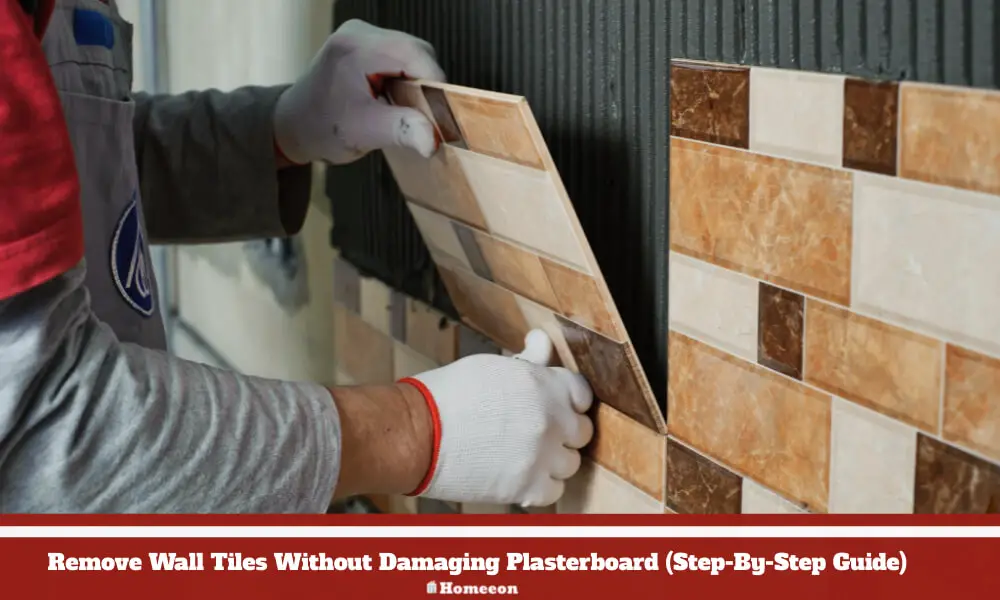
Simple Steps To Remove Your Wall Tiles Without Damaging Plasterboard
Depending on the grout type, you can also remove wall tiles using a grout saw or chisel. It might be a simple or challenging task to remove tiles mounted on plasterboard relaying on the tile adhesive used. Plus, how they applied it. But, don’t worry, we’re going to take you through the process step-by-step on how to remove the tiles without damaging your plasterboard.
Step 1: Get Your Tools
For your work to be a bit easier, you need some tools to help you remove the tiles. Some of the tools you’ll need include;
- Gloves
- Heat gun
- Knife
- Hammer
- Scissors
- Chisel
- Safety glasses
- Rotary grinder
- Sandpaper
- Drop cloth
- Bucket
Step 2: Protect Yourself
Always keep safety at the forefront of your mind when removing wall tiles or other work. The main safety item you will need is a pair of safety goggles, a hardy pair of work gloves, knee pads, and a dust mask.
The gloves will protect your hands from any fly-away shards, while the safety goggle will protect your eyes. Knee pads will help significantly if your work involves kneeling a lot. The mask helps filter out any dust that begins to float in the atmosphere due to the removal process. You should also wear long sleeves, closed pants and shoes.
If you don’t have these items, don’t stress, they are readily available at most hardware shops nearby.
Step 3: Protect Your Surrounding.
It would be best to protect your surroundings since shades of tile can scuff or dent the other surface area in the room. Also, clear the surrounding area by laying down a cloth or trap to protect fragile surfaces. It makes cleanup easier for you as well.
If removing the bathroom tiles, cover the sink and any other porcelain fixtures with a drop cloth. For your bathtub or shower pans, you can protect them from falling tiles by covering them with cardboard. Cover any drains by putting tape over them.
Step 4: Decide Where To Remove The Grout.
Whereas removing more grout will surely help, most people save time and remove only it on the most crucial surfaces. Removing grout between tiles helps somehow save some tiles, which you can reuse later.
If you’re removing one tile only, remove the grout from all sides to avoid damaging the other tiles around it. But, when removing the entire tile wall, make sure you remove the grout along with the ceiling and the floor correctly.
Step 5: Heat The Grout
Even though wall grout is easy to remove, you can blow dryer or heat gun to soften hard grout if need be. Spend at least thirty seconds warming up the ground line, especially if you’re only managing to scrape away a small portion at a time, and try once more.
Step 6: Scrape The Grout Away With Your Knife.
This process takes a while but has a low risk of damaging the tiles around. Place your knife in a strong holder if you’ve one and pass it keenly and repeatedly around the tile or tiles you’re planning to remove.
An ordinary grout saw will not work for wall tiles due to the lug spacers that connect adjacent tiles below the grout.
Step 7: Try A Rotary Grinder Instead.
A small rotary grinder or a Dremel can remove grout much faster than a knife. However, it can break tiles more easily if your hands slip. Set your tool on the lowest setting and move it slowly through the grout line.
Consider increasing the rotor’s speed if you have stable control over the tool and your tiles, don’t crack when you nick them. You can purchase an extra-small head attachment for it to fit between the tiles.
Step 8: Remove Grout Till The Spacer Lugs Are Visible
It’s unnecessary to remove all grout particles but remove a considerable portion to make tile removal feasible. At least scrape the grout away until the metal spacer lugs are visible.
Step 9: Try And Locate Any Loose Tile
If you plan to remove the entire wall, try tapping the edges of your tile with a chisel to locate any loose ones. It’s normally harder to remove the first tile than the rest. So it’s pretty fine to take some extra time to see if you can get any luck with it.
If you manage to get one, use either of the following products to remove it. Your best bet is on the surface, where you have removed the grout or surfaces with signs of water damage.
Step 10: Remove The Tiles From Your Wall With A Chisel
Using this approach, you will save more tiles for reuse unless they are unusually well-bonded or are recent installations. Try it by inserting a knife, chisel, or other flat tools between the walls and the tiles parallel to the wall.
Tap your tool handle with a hammer until the tile is separated from your wall. You might need to pry it off in two to three places if it’s firmly attached.
If the tiles break rather than become loose, try an air chisel.
Have someone with leather gloves assist you in grabbing the tiles as they break before falling.
Typically, the first tile is much harder than the rest. Take your time to remove the first one. Then, attack the exposed edge of your next tile. Make sure you use extreme caution near the edges since the tile will chip easily.
Always use tape or masking tape to stick the tiles you want to remove, especially if you’re trying to replace one or two tiles because of a crack. Then, tap the tiles using a chisel; you can start in the middle working your way out. Once you’ve removed part of the tile, use your chisel to get behind your tiles and tip it sideways to remove the rest.
Step 11: Breaking Your Tiles If Necessary
You might be forced to break your tiles if they are set directly into the mortar. Meaning, you’ll have to give up on the idea of saving some of your tiles and cracking them into pieces. Start by using a chisel and a hammer to make a hole in the middle of the tiles. Then chisel out the cracked parts of the tile and be keen not to damage the tiles around. Eye safety is paramount, especially in this method.
The porcelain tiles normally break into very sharp, glass-like shards. If this happens, You can consider breaking them from the side using a hammer and chisel to reduce fragments. Be extra careful with the tile-removing tools and make fair use.
Step 12: Clear The Surface Of Any Remaining Setting Material
You can use a cold chisel to remove any remaining materials until the exposed wall surface is thoroughly dressed. You might not be able to remove all the grout and adhesive used, but you’ve to be sure that a special wall tile is flush with the rest of the wall tiles when installed.
Step 13: Get Rid Of Spacer Lugs Before Attempting To Place A Replacement Tile.
These are metal objects that can be left behind throughout the removal process. You can remove these spacer lugs by cutting them off with scissors, cutting them with a knife, breaking them with pliers, or sanding them with sandpaper. Sometimes some of your removal power tools may leave particular marks on your plaster, which are terrible.
How Can I Smoothen Bathroom Walls After Removing Tiles?
After removing your bathroom wall tiles, you can apply mastic remover to make it smooth using a roller. Ensure you apply it in the thickness recommended by the manufacturer and let it sit as per the instructions. Then, scrape the wall with a metal scraper or a putty knife, removing the adhesives.
Can I remove the wall tiles in one piece?
Removing wall tiles in one piece is challenging and often not possible due to the nature of tile adhesion and the fragility of the tiles. Tiles generally adhere to the surface using a strong adhesive, making it difficult to remove them without breaking. It is more common for tiles to come off in smaller pieces during removal. Taking proper precautions and using the right tools can help minimize damage, but it’s essential to be prepared for the possibility of tiles breaking during the process.
Final Word
Removing wall tiles while protecting the plasterboard is possible, although it can be time-consuming, challenging, and frustrating at times. To make your work a bit easier, you need to identify first the type of adhesive used and how they applied it. Then, locate a loose tile and start the process from a tile by following the step-by-step guide in our article. After removing the tiles, it’s important to repair part of your plaster wall to have a complete and clean job.
References:
https://www.dbsbathrooms.co.uk/news/how-to-remove-tiles-off-the-wall/
https://constructionhow.com/how-to-remove-wall-tiles-without-damaging-plasterboard/
Emma is a graduate of Domestic Science or Family and Consumer Sciences (Home Economics) from the University of Wisconsin. She has 7 years of experience Working with the strategic section of BestBuy and now writing full-time for Homeeon.
From Managing the Home, Interiors, Cleaning, and Exteriors to Gardening and everything about Making A Home Liveable – is her passion and this Homeeon is the result of this.
Emma loves decorating her home with the best stuff found online. She cares about quality over anything and writes reviews about them here in Homeeon. Get in touch with her over Pinterest.
Keep reading her blogs.