Last Updated on August 1, 2023 By Emma W. Thomas
Clean a vacuum cleaner after every use. Remove debris, empty the dustbin, and clean the filters regularly. Check for clogs and wipe down the exterior. Proper maintenance ensures optimal performance and extends the vacuum’s lifespan.
How Often Should You Clean The Vacuum Cleaner?
Cleaning a vacuum cleaner should not be a one-time thing as doing so could lead to a total malfunction of the machine. Instead, it should be a continuous process, although the cleaning should be in phases and different parts. The cleaning process and periods include;
Cleaning The Brushes And Bristles After Every Use
You should check the brushes and bristles to ensure no debris or hair is trapped on them. If there are loose strings or hairs around the brush bristles, you should cut them with a pair of scissors instead of unplugging them as it could damage the bristles. You should also spray the brushes and bristles with a disinfectant for proper sanitization since they both come into contact with your house surface.
Emptying The Canister After Several Uses
Vacuum cleaner experts recommend that you should not allow your vacuum cleaner’s canister to fill up. Instead, it is best if you empty it after every single use. If not, consider emptying it once it is two-thirds full. In this way, you will avoid potential germs and bacteria from taking hold of your appliance. Additionally, emptying the canister also increases the performance and efficiency of your machine.
Checking And Soaking All The Filters At Least Once A Month
Although checking the filters should be an annual routine, you might consider checking them more often. You could use the manufacturer’s manual to see the location of each filter and how you can carefully detach it. If the filter is removable, take it out, shake it, then rinse it under cold running water. Leave it to dry before reassembling it back.
Disassembling The Vacuum Cleaner
You need to disassemble your machine for a deep clean every one to three years. Some individual parts may require regular cleaning. However, experts consider it a rule of thumb to disassemble the entire vacuum and scrub it down. Such cleaning requires a lot of hot water, cleaning brushes, and a can of compressed air.
Soak any washable parts such as the canister and give them a thorough scrub. Leave them out to dry before safely assembling all the parts. Using the compressed air, blow it over the vacuum cleaner to expel all the dust and debris stuck in its nooks and crannies. Remember to wipe the external parts with a wet towel as well.
Replacing Your Equipment
After ten years or so, you should be replacing the vacuum cleaner. Reports have it that most of these appliances last for at least eight years if well-maintained. Stretching to use one for more than ten years will be just dragging dirt and dust all over your house.
What Supplies Do You Need to Clean Your Vacuum?
Cleaning a vacuum is essential to its longevity and effectiveness. Without regular maintenance, your device may experience problems or stop working entirely. Here are several supplies that are essential when planning to clean your vacuum:
- A Screwdriver:
A Philips-head screwdriver may be needed to disassemble parts of the vacuum for a thorough cleaning. Make sure it’s suitable for the specific screws on your vacuum. - Soft Cleaning Brushes:
Compact and soft brushes help to remove dust and other debris from various parts of the vacuum, avoiding any potential damage to delicate sections. - Microfiber Cloth:
A microfiber cloth is helpful for wiping down the outer surface of the vacuum and its detachable parts. Its gentle texture is perfect for cleaning delicate or scratch-prone areas. - Compressed Air:
Compressed air can be useful for dislodging dust or crud stuck in hard-to-reach areas of the vacuum cleaner. It can blast away debris with ease. - Warm Water:
A splash of warm water can help to dislodge stubborn dirt or stains from certain parts of the vacuum. Always ensure your vacuum is thoroughly dry before reassembling; water damage can be a concern with electrical appliances. - Dish Soap:
A mild dish soap can be mixed with warm water for a gentle cleaning solution. This is perfect for washing the dust canister, attachments, and filters if the manufacturer allows it. - Scissors:
These are ideal for cutting away any hairs or threads tangled around the vacuum’s brushes. - Pliers:
In case of anything lodged too deeply in nooks and crannies, a pair of pliers can be a real helping hand.
Here’s a simple table to round up what has been discussed:
| Supplies | Explanation |
|---|---|
| Screwdriver | Used for disassembling parts of the vacuum. |
| Soft Cleaning Brushes | Used to gently remove dust and debris. |
| Microfiber Cloth | For wiping down surfaces. |
| Compressed Air | Helpful for removing debris in hard-to-reach areas. |
| Warm Water | Useful for dislodging stubborn dirt or stains. |
| Dish Soap | Mixed with water to create a gentle cleaning solution. |
| Scissors | Ideal for cutting away tangled hairs or threads. |
| Pliers | Handy when items are lodged in tight spots. |
How Do You Clean A Vacuum Cleaner?
Vacuums are different depending on the model, but some components are similar in all of them, such as filters, the canister, the beater bar, the fan, and the motor. Ensure that you will remember to return all parts to their specific locations. Simple methods on how you can clean your vacuum include;
Disassembling The Machine
When disassembling, remove any dirt in the dust bag or canister. Take away all washable parts that are replaceable, such as filters and other attachment accessories.
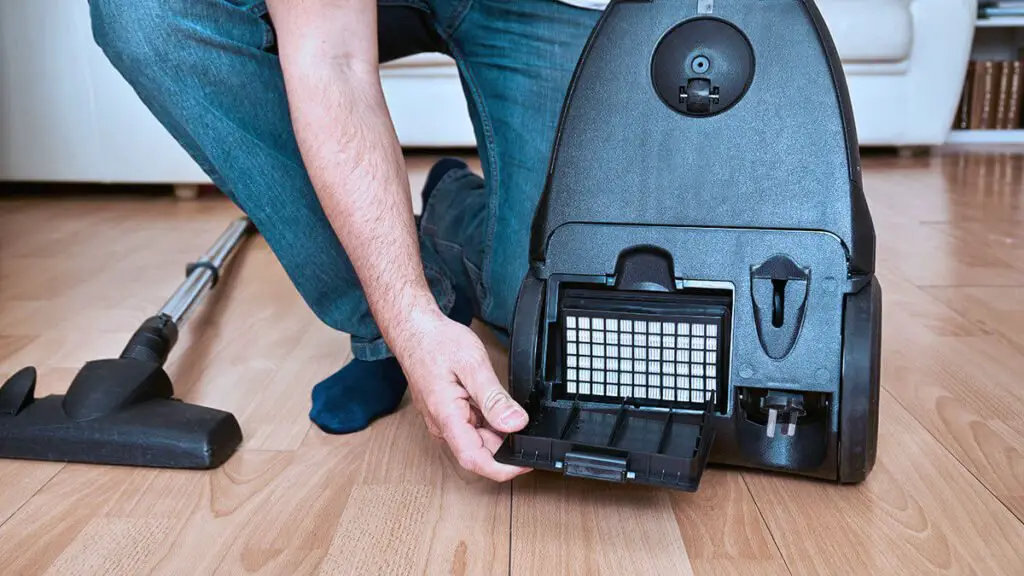
Cleaning The Filters
Some vacuum cleaners contain more than one filter. You can use manuals that verify the number of filters in a vacuum cleaner and their specific locations. Dip the washable filter in water and scrub it using a brush. You could use a disinfectant for sanitizing the filters. Rinse it and allow it to dry. For non-washable filters, you can tap it a couple of times against a surface to eliminate dust and other debris.
Another option is using a cloth to wipe off the dust. Additionally, in case you notice any faulty filters, it is the best time to replace them. You should not assemble the parts while wet as it increases the chances of mold growing inside the vacuum cleaner, which could pose a health threat.
Cleaning The Canister
For vacuum cleaners that come with a dust bag, you can skip this step. In most vacuum cleaners, dust bags can only be replaced and cannot be washed. Those with canisters involve emptying them first. Separate the canister from the vacuum unit and soak it in warm soapy water. Scrub it with a brush, rinse it with cold water, and leave it to dry.
Cleaning The Vacuum Unit Interior
Once the canister is removed, you can use a toothbrush to remove dirt from the vacuum unit’s interior parts. Ensure to do it in downstrokes to prevent dirt from moving further upward. After that, you can blast compressed air to remove hard debris and dirt difficult to remove. You should be careful and check out for flying dust particles that may enter your eyes or trigger allergic reactions.
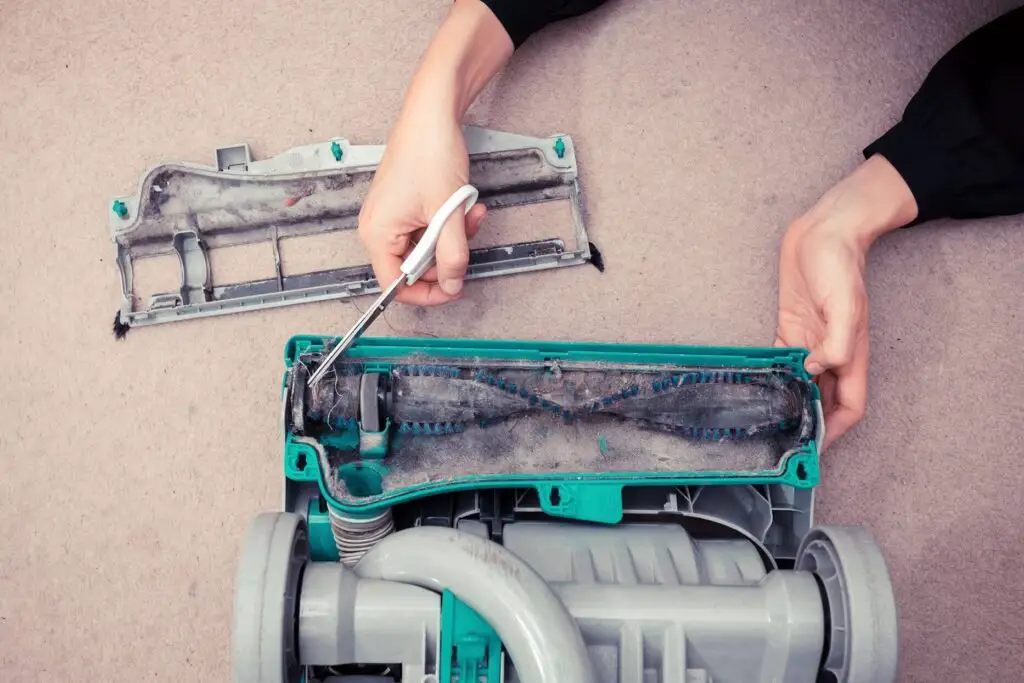
Cleaning The Beater Bar
Hairs and strings get caught up in the beater bar. Cleaning this part involves trimming away the strings and hairs trapped on the bristles using a pair of scissors. Carefully pull them out without damaging the bristles. Use a toothbrush to rub off the remaining dirt. If the rotating brush can be separated from the vacuum unit, you can unscrew it for further scrubbing.
There is also a small passageway that can be easily ignored and should be cleaned. Since the bottom of the vacuum cleaner comes into contact with the surface of your home, you need to disinfect it. You can apply some alcohol to the bottom of the cleaner using a cotton pad. You can also inspect the vacuum drive for any wear and tear or any other tagging signs indicating a need for replacement.
Cleaning The Attachment Accessory
Cleaning the attachment accessories is an easy process that involves dipping all washable accessories in warm soapy water, scrubbing, and then rinsing them in cold water. If there are strings or hairs attached to them, you should cut them with a pair of scissors and carefully pull them out. Lay the accessories to air dry for at least 24 hours. Using a microfiber cloth, wipe down the entire vacuuming unit. You can disinfect its surfaces by rubbing some alcohol with a cotton pad.
Reassembling The Parts
Once all accessories are dry, reassemble the vacuum cleaner and replace the worn-out parts with new ones. After that, give the vacuum cleaner a final wipe on its surface, and it is good to go.
How Do You Clean a Robotic Vacuum Cleaner?
A robotic vacuum cleaner has become an indispensable appliance in many homes. However, to ensure its efficient operation, it requires regular cleaning and maintenance.
1. Clean the Dustbin:
To clean the dustbin, remove it from the vacuum and empty it into a trash can. Use a mild, soapy solution and a non-abrasive cloth to wipe internally and externally, ensuring all debris is removed. Remember, it is essential to dry the bin thoroughly before reassembly to avoid damage to the machine.
2. Clean the Filters:
Most robotic vacuum cleaners come with HEPA filters that trap dust and allergens. Over time, these filters can stifle the vacuuming process if not cleaned. You can clean the filters by gently tapping them over a trash can to remove the excess dust. Some filters are also washable but ensure the filters are completely dry before placing them back.
| Steps | Cleaning Instructions |
|---|---|
| 1 | Remove the filter |
| 2 | Tap gently over the trash can |
| 3 | For washable filters, rinse under cold water |
| 4 | Allow to completely dry before reinserting |
3. Clean the Brushes:
There are usually two types of brushes in a robotic vacuum cleaner: the main roller brush and the side brush. You can clean both by using the cleaning tool usually provided with the vacuum. For stuck hair and debris, a pair of scissors will suffice.
4. Check and Clean the Wheels:
Do not ignore the wheels of your robotic vacuum cleaner. They could have debris or hair tangled around them, which can hinder movement. A thorough inspection and cleaning, if necessary, of both the large and small wheels will prevent any wheel-related issues.
5. Clean the Sensors:
Clean the cliff sensors and charging contacts using a dry cloth to wipe off any dirt. The cleanliness of these parts ensures the device doesn’t go tumbling down stairs and successfully docks for charging.
6. Replace Old Parts:
Parts like filters, brushes, and batteries will eventually wear out. Replacing these parts as per the manufacturer’s recommended schedule will ensure that your robotic vacuum cleaner continues to work efficiently.
What Should You Avoid When Cleaning A Vacuum Cleaner?
The following are some important things to remember when cleaning your vacuum cleaner:
- Avoid checking your appliance when still plugged in. Remember to turn off and unplug the vacuum cleaner whenever you want to look at the beater bar. When running, a vacuum cleaner can pull hair from your head or loose clothing. It can even cause injuries to your body, and you should, therefore, be careful.
- You should avoid using the vacuum cleaner if wires are sticking out or there are electrical faults. It is dangerous and can cause electrocution or even start a fire in your home.
- Lastly, avoid carrying the vacuum cleaner by its cord. Doing so could affect the cord resulting in an electrical fault.
What Should You Do If A Vacuum Cleaner Is Smelly?
Some vacuum cleaners may become smelly if you fail to empty the dust bag or the canister regularly. It could also become smelly due to sucking up a nasty item from the vacuuming area where pets could have laid.
To freshen your vacuum cleaner, you can place fresh air scent beads in the vacuum bag before vacuuming. You could also sprinkle small amounts of cinnamon or ground potpourri into the dust bag. Sprinkling the vacuuming surface beforehand is another option to freshen up and protect a room from a smelly vacuum cleaner.
However, in case of a burning smell, consider checking the vacuum unit as it may be due to a faulty electrical cord. It would help if you had an electrician look at it as it may cause electric shock or start up a fire. In such a case, wait until the electrician gives you the go-ahead to use the vacuum cleaner to prevent such accidents.
Conclusion
When to clean a vacuum cleaner depends on the manufacturer’s instructions. Some may require annual cleaning, whereas, in others, it may be monthly. Some vacuum cleaners with dust bags require regular emptying to prevent them from getting a foul smell. Emptying the dust bag also enhances a vacuum cleaner’s performance. A well-maintained vacuum cleaner could even last up to eight years which is their minimal lifespan. You may replace the vacuum cleaner after ten years since this period, most of them have lost their efficiency and will perform poorly.
References:
https://www.thespruce.com/how-to-clean-a-vacuum-4788316
https://www.merrymaids.com/cleaning-tips/diy/how-to-clean-a-vacuum-cleaner/
Emma is a graduate of Domestic Science or Family and Consumer Sciences (Home Economics) from the University of Wisconsin. She has 7 years of experience Working with the strategic section of BestBuy and now writing full-time for Homeeon.
From Managing the Home, Interiors, Cleaning, and Exteriors to Gardening and everything about Making A Home Liveable – is her passion and this Homeeon is the result of this.
Emma loves decorating her home with the best stuff found online. She cares about quality over anything and writes reviews about them here in Homeeon. Get in touch with her over Pinterest.
Keep reading her blogs.