Last Updated on August 14, 2023 By Emma W. Thomas
Roof jacks are devices used in roofing to provide support and stability. They’re adjustable metal brackets placed on a sloped roof, allowing workers to walk safely and perform tasks. They’re often used with 2×4 or 2×6 lumber. Roof jacks enhance safety and efficiency during construction.
What Are Roof Jacks?
When it comes to roofing projects, safety is paramount. One tool often utilized for this purpose is the roof jack. Roof jacks provide safety and convenience when carrying out repairs or installations. Without further ado, let’s explore roof jacks more deeply.
- Definition
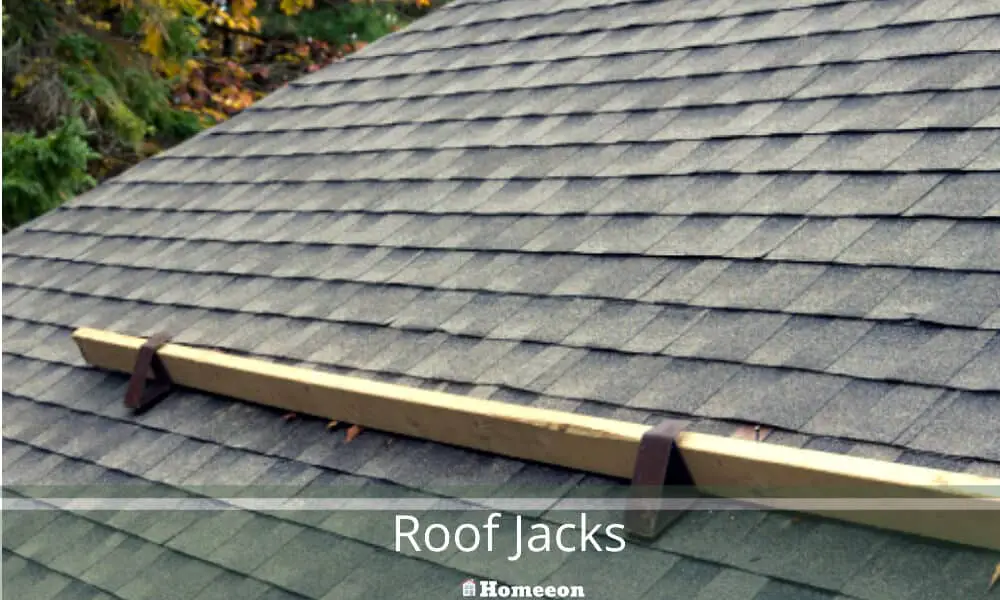
A roof jack, sometimes known as a roof bracket, is a tool designed to provide temporary support for workers and materials on a roof. By using roof jacks, they ensure safety and a level working area, especially on inclined surfaces. - Components of a Roof Jack
Roof jacks consist of a steel plate with notches designed to hold a scaffold plank and a bracket that nails into the roof. Nails are typically used to secure the roof jack to the rafters, ensuring stability. - Uses of Roof Jacks
Primarily used in roofing projects, they come in handy during the installation or repair of shingles, sheathing, or other roofing materials. They offer an even platform for carrying out work, making it easier to handle tools and materials. - Varieties of Roof Jacks
There are different types of roof jacks available in the market based on the complexity of tasks and the degree of inclination of the roofs – some are specifically tailored for steep roofs, while others are designed for less-pitched roofs. - Proper Installation
For safety, correctly installing roof jacks is crucial. They need to be nailed into the roof sheathing and into the support structure beneath it securely. Also, the number of jacks should align with the workload and weight of the materials. - Safety Considerations
While roof jacks enhance safety during roofing projects, they need proper handling themselves. Ensuring that they are free from damage or defect before using them is important. Also, they should be removed when not in use to avoid accidental injuries or structural issues. - Advantages of Roof Jacks
They offer numerous benefits including providing a stable base for work, improving efficiency by reducing worker fatigue, and most importantly, enhancing safety during roofing operations. - Disadvantages of Roof Jacks
However, there might be some cons like potential damage to shingles when installing or removing the jacks (though this can be managed with careful operation), plus the time and effort required to properly set them up and take down.
What Are Roof Jacks Used For?
Roof jacks help you to complete your job without having any accidents. They help you to maintain your balance and safety when fixing roofs. You can use these tools for various roofing assignments. Roofing jacks have metallic hooks curved on one end and j-shaped on the next end.
The curved end is joined to a large plank or board while the j-shaped end is fixed to the shingles. A roof jack enables you to stand and move around effectively without the fear of falling. If your roof is fixed with tough shingles, you can use two to three jacks to move on top of the roof easily.
Steps To Using Roof Jacks
Roof jacks are essential equipment that offers a stable work surface for applying your roof. Follow these steps to use them effectively:
Step 1. Attaching The Jack
Identify a rafter below the sheathing and feel the nails driven into the rafters through the underlayment. Fix the jack into a rafter using 16d nails but not roofing nails.
Step 2. Securing The Board
Slip a plank that will fit snugly into the jacks (a 2×8 or 2×10 will be ideal). Make sure the board overhangs the jack by around 6 inches on every side. Attach the plank securely to the jack to prevent it from tipping over.
Step 3. Taking Out The Jack
After you are done using the jack, you need to remove it from your roof. Tap up with a hammer to detach the jack from the nails. Slip a flat pry board under the shingle and on top of the nail head. Pound the nails down to drive them so as not to poke through the roofing. You can also lift the tab as you nail if it is flexible.
How Many Roof Jacks Should I Use?
The number of roof jacks you should use will depend on your roof’s angle. If your roof’s angle is 45-50 degrees, you can use two or three roofing jacks. A roof with a steeper angle needs more jacks to improve your balance. You will also require a straight and flat board for proper balance.
How To Use Roof Jacks
To use the jacks, you need to find a flat and clean part of your roof. Since most shingles could be worn out and may easily break, you will need to place your jacks in the fourth or fifth shingle course. You can easily and perfectly move onto the roof through the dead area with a jack roof coating.
After picking the part, you need to drive the nails, place the roof jacks to the initial jack’s side, and leave about 4 feet in between jacks. Avoid overlapping the nails and test the jacks once you have fixed the planks or boards. The jacks are safe to use if they can support your weight, but you need to adjust the plank if it is wiggling.
What Is A Pipe Jack On A Roof?
A pipe jack or boot is a pre-formed flange positioned over a vent pipe to close the roof around the vent pipe’s opening. This tool is made of rubber, metal, or lead and is also referred to as a plumbing boot/jack or no-caulk or leads.
How To Safely Get To The Roof
If you want to get to your roof safely without falling or getting injured, you need a ladder. You can either buy or rent a sturdy extension ladder that is about 3 feet above the roof edge. If you are looking for the lightest ladder, go for aluminum, but fiberglass is perfect for better protection from electrocution.
Place the ladder on the firm-level ground. But if your ground is not even, put squares of plywood under one foot along with the ladder base level. Secure the tool with a rope or wire tied to stakes and fasten the top with a wire or rope tied to a secure anchoring point. You can use a 20d nail driven into a rafter as an anchoring point to prevent the ladder from slipping while you step into the roof.
Here are some basic steps to follow when using a ladder to and from the roof;
- Do not carry anything with you up the ladder. You can have someone to help you or hoist supplies and tools with a bucket tied to a rope.
- Ensure that the top of the ladder extends at least 3 feet above your roof edge. Doing this provides you with something to hang on to when stepping off the roof.
- When stepping onto and off the roof, keep your two hands on your tool’s top rung.
Safety Precautions When Working On Your Roof
When working on your roof, you need to observe all the safety precautions to avoid injuring yourself or others. Here are some tips for your safety on the roof;
- If your roof is high or steep, don’t work on it unless you are a professional. Working on such roofs could cause death or long-life disability.
- Work when the day is clear, cool, and calm. Avoid wet roofs since they are slippery and may cause you to fall. Do not work when it is windy as this may pose a danger or when it is excessively hot as this may soften the shingles hence damaging them.
- Ensure that your shoes have a soft rubber for added traction
- Mark off the ground beneath your working area with a rope. Doing this will let the people below know that you are working on the roof. Call out or look around before throwing anything down to prevent injuring others.
- Avoid slate or tile roofs if you are not experienced to prevent damage.
References:
https://beezzly.com/what-is-a-roof-jack
https://vnoutsourcing.com/top-off-your-roof-with-the-best-the-ultimate-guide-to-roof-jacks/
Emma is a graduate of Domestic Science or Family and Consumer Sciences (Home Economics) from the University of Wisconsin. She has 7 years of experience Working with the strategic section of BestBuy and now writing full-time for Homeeon.
From Managing the Home, Interiors, Cleaning, and Exteriors to Gardening and everything about Making A Home Liveable – is her passion and this Homeeon is the result of this.
Emma loves decorating her home with the best stuff found online. She cares about quality over anything and writes reviews about them here in Homeeon. Get in touch with her over Pinterest.
Keep reading her blogs.