Last Updated on July 20, 2023 By Emma W. Thomas
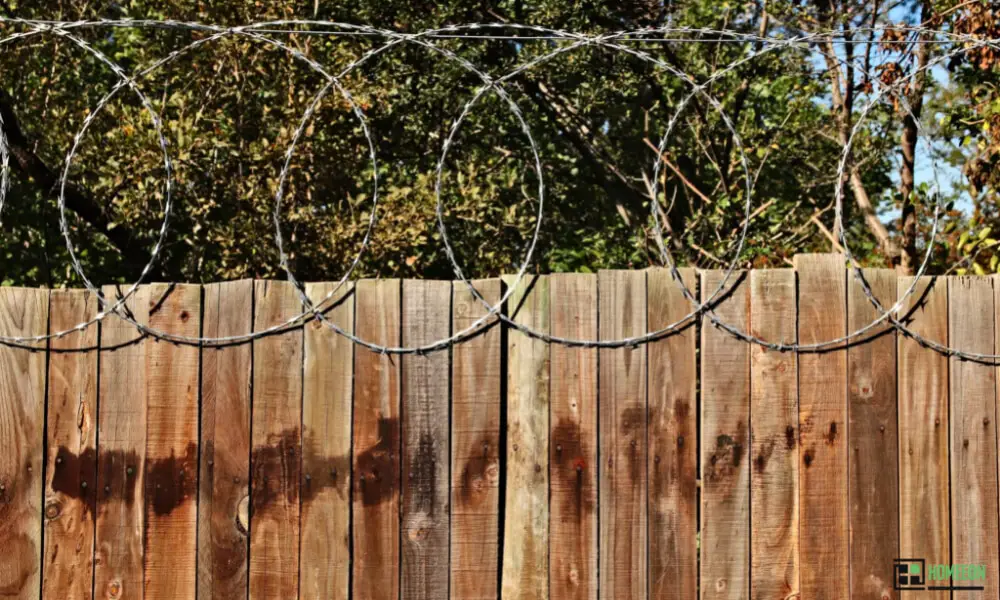
A wood and wire fence is a type of fencing that combines wooden posts and rails with wire mesh or wire panels. It provides a practical and cost-effective solution for securing a property while maintaining visibility. The wooden elements offer stability and support, while the wire components add security and keep pets and small animals from entering or leaving the area. The wire can be either welded or woven, providing different levels of strength and aesthetics.
Types Of Wood And Wire Fences
There are several types of wood and wire fences, each offering unique features and designs. Here are some common types:
- Split Rail Fence with Wire Mesh: This type combines traditional split rail wooden fencing with wire mesh or welded wire panels, providing a rustic and open look while still keeping small animals out.
- Privacy Fence with Wire: These fences use wooden boards for privacy with a section of wire mesh or wire panels at the top or bottom for added security and visibility.
- Picket Fence with Wire: A classic picket fence design with wire mesh or panels added to deter pets or wildlife from entering or exiting the enclosed area.
- Wire Deer Fence: Typically used in agricultural settings, this fence incorporates tall wooden posts with high-tensile wire mesh to keep deer and other large animals out of crops or gardens.
- Post and Rail Fence with Wire: This fence style combines wooden posts and rails with horizontal wire strands, providing a simple and effective boundary.
- Welded Wire Panel Fence: This consists of wooden posts and a series of welded wire panels, offering a more modern look while ensuring security.
- Woven Wire Fence: Also known as “horse fence,” it uses wooden posts and rails with tightly woven wire to create a strong and visually appealing barrier, suitable for livestock containment.
- Electric Wire and Wood Fence: Utilizes wooden posts and insulators to support electric wire strands, creating a psychological barrier for containing livestock.
How To Build A Wood And Wire Fence? Step-By-Step Guide
Building a wood and wire fence does not require a lot of know-how and skill. You need some basic skills to construct one as it is not a complicated process. However, you have to make a good structure from the beginning to have a sturdy fence. This ensures it lasts longer, and you will not be fixing it after every few months.
Tools you will require to build a wood and wire fence:
- Work gloves
- Claw hammer
- Tape measure
- Post-hole digger
- Shovel
- Wire cutters
- Crimping tool
- Post pounder
- Fence pliers
- Circular saw
- Chainsaw
- Tamping tool
- Fence tensioner
- Safety goggles
Once you have all these tools, you are ready to start building your fence.
Steps For Putting Up A Fence:
Note: These steps apply to most types of wire and wood fences.
Step 1: Define Post Locations
First, you have to know the measurements of the piece of land that you want to fence. Know where the corners are and where you want a gate to be. Put marks on your corners with a stake. Check your measurements to ensure that all the posts align. Also, check if they are all on the marked area that you want to fence.
To get a clearer view, tie a string from one corner to the other. You can also pour some chalk dust from one end to the other. This works as a guide since guessing with your eyes can be misleading.
The next step is to measure where you want your complementary posts to be installed. These complementary posts are installed at an average measurement of 7-8 feet between them. After that, ensure that you have marked points at which you want to install the remaining posts.
Step 2: Mixing The Concrete
After you set the locations of the posts, the next task is to mix the sand ballast and cement to make your concrete. Once you install the posts into the pre-dug hole, you will need the concreted to help hold the stakes permanently in place. You can mix this in a wheelbarrow to ease movement from one point to the other.
Step 3: Planting The Posts.
Your posts should be at least 8 feet long, but if you require longer ones, you can still get them. Set your stake at least 2 feet deep. Dig your holes for the corner posts and the other complementary posts and set them up, respectively.
It is, however, a requirement to fill the bottom of the dug holes with gravel to reduce the chances of the wood rotting over time. After the gravel is set, now put your post in the hole. You can get someone to help. Start pouring in the concrete and ensure that the post remains straight; regularly adjust your angles to ensure the post does not tilt.
It is advisable to have someone holding the post as you fill in the hole with concrete. After the posts are set, you can give them time to dry and stand firmly. Regularly check on them and their progress as they dry. This is needed to see if any of them are moving out of position.
Once the concrete is dry, you can add dirt to the remaining visible part of the hole and stamp on it to ensure it is well set and will not be eroded.
Step 4: Fitting The Wire
Unroll the bale of fencing barbed wire or the bale of mesh wire. For barbed wire, you can nail one end at the corner post, move to the next as you nail it in place, and tighten it.
For the mesh wire, you need someone to help you stand it up against the corner post. Now nail it into the corner post. Or you can use a heavy-duty staple and insert it at the top, bottom, and center. You can add more if you want to. Unroll the mesh wire to the next post, nail it, or staple it with more nails or staples to make sure it is stable. Only add nails and staples if necessary.
It is necessary to ensure that the wire mesh or the barbed wire is stretched to avoid sagging. When the fence is not tight, it either does not last long or does not serve its purpose, i.e., keeping things in or out.
Once the wire fitting is complete, you can cut off the excess and store it for later use.
Step 5: Installing The Gate
This is the final step of building a fence. When the wall is finally installed, you can now go to the part you had marked up in the beginning and put up your gate. The gate should be about the same height as the fence. Stand the gate in place; hammer in the two hinges on one side of your gate and the opposite. Finally, install a latch and consider locking your gate to keep your fenced place safe.
Advantages Of A Wood And Wire Fence
- Wood and wire fence are cheaper. When compared to the other types of fences available, this is cheap. All the items you require to make a wood and wire fence are not expensive. Also, after installation, the fence requires next to zero care and maintenance.
- Quick and easy installation process. Wood and wire fence takes a short time to install. The installation does not require skilled labor. You can wake up one day together with your family or friends and install it.
- The fence is long-lasting. Once installed, it can survive for many years with no significant damage. There are also minimum repairs needed after installation.
- It is not restrictive. Compared to other fences, like brick walls, the wire and wood fences come out on top. You can easily see through it, therefore, allowing you to monitor in and outside the gate while keeping your place safe.
Disadvantages Of A Wood And Wire Fence
While wood and wire fences have their advantages, they also come with some disadvantages:
- Limited Privacy: Wood and wire fences, especially those with wire mesh, offer less privacy compared to solid wood or other opaque materials. They allow visibility into and out of the enclosed area, which may not be ideal for properties seeking maximum privacy.
- Maintenance: Wooden elements of the fence require regular maintenance to prevent rot, warping, and insect damage. Additionally, wire components may need occasional repairs if they become damaged or loose.
- Durability: Wood and wire fences might not be as durable as other fencing materials, such as vinyl or metal. The wooden parts can be susceptible to weathering and decay over time, which may necessitate more frequent replacements.
- Security Concerns: While wire components add some security, wood and wire fences may not provide the same level of security as solid barriers. They can be easier for intruders to climb or breach compared to fences made of stronger materials.
- Pet Containment: For smaller pets, the gaps in the wire mesh might not be sufficient to prevent them from squeezing through or getting stuck, potentially compromising their containment.
- Aesthetics: Some people might find the appearance of wood and wire fences less visually appealing than other fencing styles, especially in residential settings.
- Cost: While wood and wire fences are generally more affordable than some other fencing options, they can still represent a significant investment, especially when considering ongoing maintenance and repairs.
- Installation Difficulty: Installing wood and wire fences might require more expertise and effort compared to simple chain-link fences, as they involve combining different materials and ensuring proper tension and alignment of wire components.
Take Away!
A wood and wire fence is a good choice for an enclosure. It does all that is necessary and required of a fence, yet, it is not a complicated process to put it up. Again, less resource is needed with only basic skills to install. This is the go-to type of fence for most people due to low maintenance and can be up for many years without damage.
References:
https://fenceresource.com/wood-and-wire-fence/
https://precisionfenceworks.com/wood-and-wire-fencing/
Emma is a graduate of Domestic Science or Family and Consumer Sciences (Home Economics) from the University of Wisconsin. She has 7 years of experience Working with the strategic section of BestBuy and now writing full-time for Homeeon.
From Managing the Home, Interiors, Cleaning, and Exteriors to Gardening and everything about Making A Home Liveable – is her passion and this Homeeon is the result of this.
Emma loves decorating her home with the best stuff found online. She cares about quality over anything and writes reviews about them here in Homeeon. Get in touch with her over Pinterest.
Keep reading her blogs.