Last Updated on July 23, 2023 By Emma W. Thomas
Staining wood paneling is a process of applying colored pigment to enhance its appearance while preserving its natural texture. Here’s how to do it:
- Sand the paneling for a smooth surface
- Clean off dust and debris
- Apply wood stain evenly with a brush or cloth
- Wipe off excess stain
- Let it dry before use
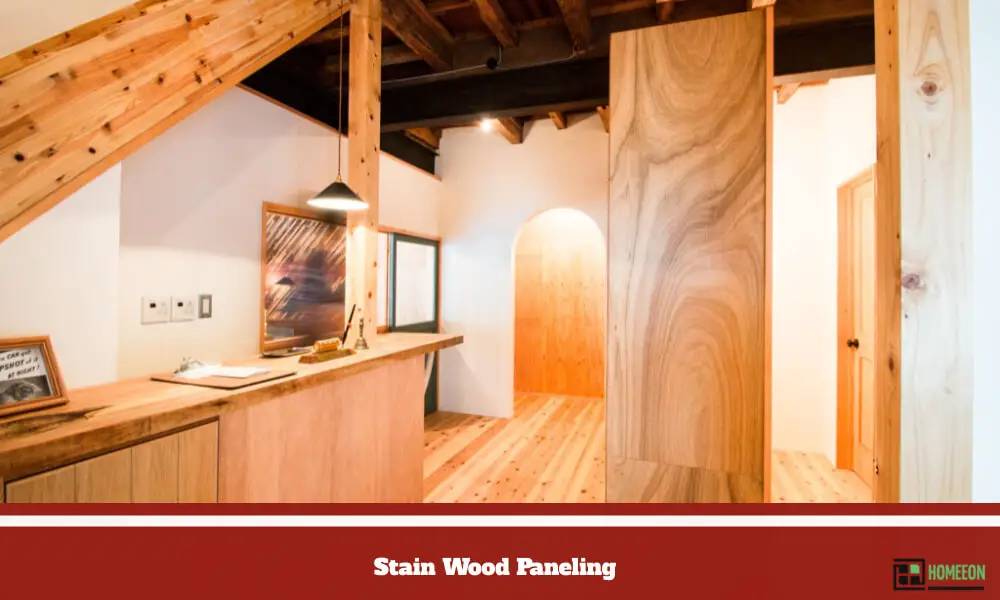
What Is Stain Wood Paneling?
Stain wood paneling refers to the process of applying a special type of coating to wooden panels, enhancing their appearance and protecting them from damage. To achieve the desired aesthetic outcome, a stain is chosen that adds color to the wood while allowing its natural grain to show through. Staining wood paneling is a popular choice for spaces such as living rooms, bedrooms, or offices, as it can create a warm and inviting atmosphere.
The process typically involves cleaning and preparing the wood surface, applying the stain either through brushing or wiping, and then sealing it with a protective finish. This treatment not only brings out the natural beauty of the wood but also helps to extend its lifespan by shielding it from moisture, scratches, and sunlight. Whether for a rustic, modern, or traditional setting, stain wood paneling offers flexibility in achieving the desired style and character for a space.
How Can You Stain Wood Panels?
Stain wood panels will change your room’s appearance by making them lighter and brighter. It can also give the walls a richer and darker shade that makes your space more attractive. You will not necessarily need to hire the services of a painter since this task is DIY-friendly.
Follow these simple steps;
Step 1 – Cleaning the wood panels
The first step will be to clean the wall panels to eliminate any fingerprints, body oils, grime, and heel scuffs. To do this;
- Add a tablespoon of dishwashing detergent to a gallon of hot water
- Dip a piece of soft cloth into the soap solution and gently scrub the walls. Be sure not to apply a lot of force, as doing it would make the stains get deeper into the wood grain pores.
- Using an absorbent, soft, and clean sponge, wipe the wall panels to dry them. Make sure that no water droplets are left on the boards.
Step 2 – Sanding the panels.
Sanding wall panels helps to maintain the wood’s warmth since sanded lumber has several open pores. It is necessary to get rid of the sand texture from the walls to prevent the stain from getting absorbed unevenly, making the wall look blotchy. To sand the walls, you need to;
- Use light and even force
- Begin with medium-coarse 120-grit sandpapers
- End with general-purpose 220-grit, then finish off using 400 to 600-grit sandpapers. Doing this gives the wall panels an even and smooth appearance.
- Use a tack cloth to wipe the sand dust from the panels
Step 3 – Conditioning The Wall Panels
Wall panels consist mainly of softwood such as spruce and pine fir, which are porous. The panels do not absorb stain evenly, bringing out a look that is not appealing to the eye. Conversely, hardwoods such as cherry, oak, and walnut have few close cell surfaces and pores, making the stain not penetrate the panels. Clear conditioners consist of reliable substances and resins that help both hardwood and softwood to fill into the open cells of grains.
The wood panels absorb the stain smoothly to appear even. Since the conditioner will help expose the wood’s gain, it is necessary to wait for about two hours to dry before painting the wall panels.
Step 4 – Staining
This step involves the application of the stain on the wall panels. All you need to do is;
- Take a piece of a soft cloth and damp it with the stain
- Apply consistent and smooth strokes of the color lightly to rub it into the wall and leave it for about 30 minutes
- Wipe off any excess stains using a soft piece of cloth. The wall’s color does not change even after wiping since it is already dried up
- Apply more stain until the wall panel color is as dark as you desire
- Apply two more coats on the wood paneling to give it a finish. Using two colors helps you to see the parts that you have worked on to get a uniform and even shade
Step 5 – Finishing
After allowing enough time for the stain to dry up, you will need to apply a clear coat of finish. For this purpose, you can use a clear polyurethane finish. This substance brushes evenly into the walls, and it also dries quickly.
Allow the finish to dry completely, then apply another coat. A second coat gives the panels a smooth appearance and an excellent finish before it dries.
Step 6 – Laminating The Wood Paneling.
Laminating wood panels is similar to painting it for another material like the wall surface. But, be sure to let the paint adhere to the shiny surface of the lamination sheets. Repainting the panel walls helps improve the appearance of your room, making it look modern in no time.
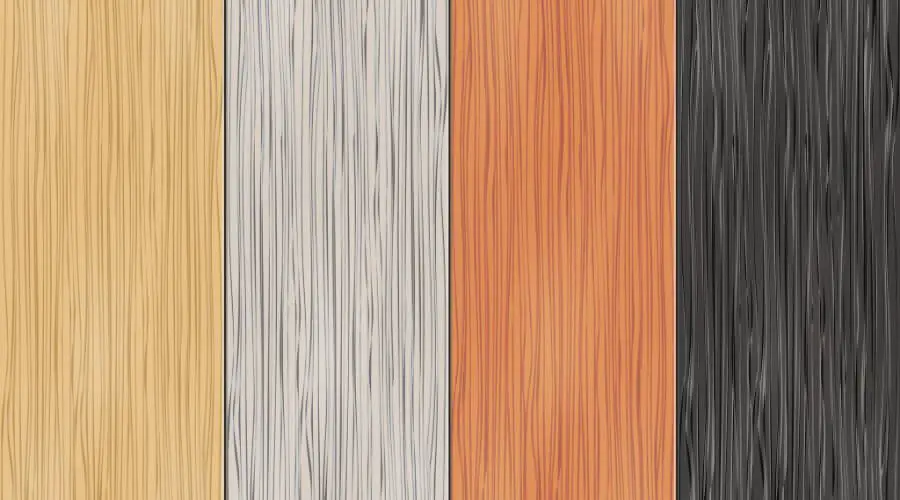
You may also stain your wood panels grey since it is an easy and quick process. You can choose different shades of grey stain wood colors from your local home improvement stores. Whitewash stain paneling can be done similarly to grey stains. To stain the wood panels white, follow these simple steps;
- Use dilute TSP to clean the wall panels
- Sand down the boards lightly
- Use painter’s tape and drop cloths to protect your floor from paint splatter
- Apply two thin coats of stain-blocking primer
- The last step is to apply thin coats of white paint lightly
You may also consider a Gel stain which is customized for artificial wood paneling projects. You can easily apply the gel stain on vertical board coats since it has enough thickness and will adhere to most materials. It is also available in several colors.
Danish oil is another alternative to use as a thin stain for wood paneling as it is easy to use. To use this product;
- Wipe any stain on the wood surface using an ordinary brush
- Sand carefully if you notice that the finish is fading before refinishing
- Apply a second coat. Danish oil is a good finish for staining wood panels since it gives a neutral appearance, and it is better than any other varnish.
What Are The Benefits Of Staining Wood Paneling?
Staining wood paneling has many benefits, including;
- This process helps to protect the wall panels from any rot
- Staining wood panels prevents sunlight and moisture, making it perfect for its grains since humidity will not damage them
- Stain wood paneling is suitable for those parts of the house that experience high traffic and walking. The process helps to save on maintenance costs
- It also helps in the preservation of aesthetics in your home
- Staining processes are easy and budget-friendly. But, it is necessary to take precautions when using the products
Can You Stain Wood Without Sanding?
It might seem impossible, but believe it or not, it is quite possible to stain wood without going through the tedious process of sanding. However, it would require particular steps and certain products to ensure that the result is optimal. Here are some ideas and tips on how you can accomplish this:
1. Use a Liquid Sander
A liquid sander, also known as a deglosser, can be a useful tool for this purpose. Here’s how:
- Apply the liquid sander to the surface of the wood. This product works by eliminating the glossy finish and roughing up the surface, much like regular sandpaper would do.
- Ensure the liquid fully dries. Then you can proceed with staining the wood. Since the sander is liquid, it might take a while to dry completely.
2. Use a Bonding Primer
A bonding primer could be another practical solution. Here’s a quick guide to using a bonding primer:
- Apply a coat of bonding primer to the wooden surface. Bonding primers have adhesive properties that help paint and stains adhere better to surfaces without the need for sanding.
- Let the primer dry thoroughly. Before applying any stain, it’s critical to let the primer dry completely to ensure optimal results.
3. Clean Thoroughly
Just because you’re skipping the sanding doesn’t mean you should also bypass the cleaning. It’s vital to prep your wood before staining:
- Use a TSP substitute (trisodium phosphate) or denatured alcohol to clean the wooden surface. It helps in removing dirt, grease, and other substances that might hinder the staining process.
- Completely dry the surface. Make sure the surface is dry before you start staining.
4. Apply the Stain
Same as any typical staining process. Start applying your choice of stain once the surface is completely dry:
- Use a staining pad or paintbrush to apply the stain evenly onto the wood.
- Follow the wood’s grain as you apply the stain. It helps in achieving a neat and polished look.
5. Seal It
Lastly, don’t forget to seal the stained wood:
- Use a water-based polyurethane sealer to achieve a long-lasting finish.
Remember, every wood piece is different, and what works for one may not work for another. Therefore, it is a good idea to test these methods on small, less noticeable areas before scaling up to the entire piece of furniture or wood item.
How Can You Change The Color Of Wood Paneling?
If you desire to revamp your wood panels to give your rooms a new look, you can try out these fantastic ideas;
Painting The Wall Panels
Painting is an easy and quick fix for wall paneling. It would help if you started with a suitable primer to cover the wood grain and wall panels. Next, apply a few coats of vivid white paint. Doing this will help to brighten your room and give it a stylish, cottage-like décor.
Turning The Panels Into Regular Walls
You can purchase some drywall substances at your local home improvement store. Using this substance, fill in the visible lines and cracks of the wood paneling. You will the sand, apply primer, and use a color of your choice to paint the wood. Doing this helps to give your space to have the appearance of painted walls.
Adding Stripes Onto The Panels
You can also change the look of your walls by adding lines or stripes to them. To do this, you can paint the panel grooves using a different color from that of the paneling slats. You can choose certain styles that mimic oak, pine, and other kinds of wall paneling.
Use Of Art To Hide The Wood Paneling
It is possible to divert the attention from your wall paneling using art pieces, such as adding enormous sculptures and mirrors or a gallery wall where you hang art in a salon style. Doing this will help to distract people’s interest as they concentrate on the paneled wall of planks.
Use Curtains Or Shelves To Conceal Wood Paneling.
Shelves and curtains also come in handy in hiding the wall panels. You can disguise the panels by using built-in over the boards. You can also hang curtains over the panels to mask and soften up the room.
Conclusion
Stain wood paneling is a vital process that helps add to your room’s aesthetics and protect the panels. You can either DIY or use a professional to do it for you.
References:
https://www.sawinery.net/can-you-stain-wood-paneling/
https://www.hunker.com/12001476/how-to-stain-fake-wood-paneling
Emma is a graduate of Domestic Science or Family and Consumer Sciences (Home Economics) from the University of Wisconsin. She has 7 years of experience Working with the strategic section of BestBuy and now writing full-time for Homeeon.
From Managing the Home, Interiors, Cleaning, and Exteriors to Gardening and everything about Making A Home Liveable – is her passion and this Homeeon is the result of this.
Emma loves decorating her home with the best stuff found online. She cares about quality over anything and writes reviews about them here in Homeeon. Get in touch with her over Pinterest.
Keep reading her blogs.